How we build the model

To build a model we assemble data components into a representation of the river system and its relationships, in line with the model scope and the model schematic.
Models are built in stages as follows:
- assembling the components
- creating nodes and links
- stitching the model together
- setting node execution order
- reiterating and refining.
How complex the model we build is, and the stages of the build, will depend on how complex the river system is. Regulated river systems require more complex models. Find out more about regulated river systems in the Modelling NSW River systems section.
Model building is iterative. We might have to change what we’ve built at any step of the process if we find a problem with the model, or learn something new about the system.
Because models are complex, this happens fairly often. When it does, we revisit previous steps to address any issues.
Modelling software
Our river system models are built with eWater Source software.
Source software models are built using elements called ‘nodes’ and ‘links’.
What are nodes and links?
Nodes represent a place in the river system where an action or measurement happens –that is, where water is added, extracted, stored or recorded, or where water ownership changes.
Some nodes represent a process that occurs across a large area but that, for modelling purposes, we record at a single point.
Links represent water ‘actions’ – that is, where water passes between nodes, or where it is routed or stored.
Sourcing and collating data
When we plan a model we consider:
- the types of data we will use
- the data components we will require
- from where we will obtain the data
The Australian Modelling Practice Notes offer detailed guidance on:
- selecting climate data
- selecting flow data
- representing and sourcing demand data
- data requirements for modelling reach losses
- storage inflow derivation.
Assembling the components
Steps for building the river system model
-
Step 1
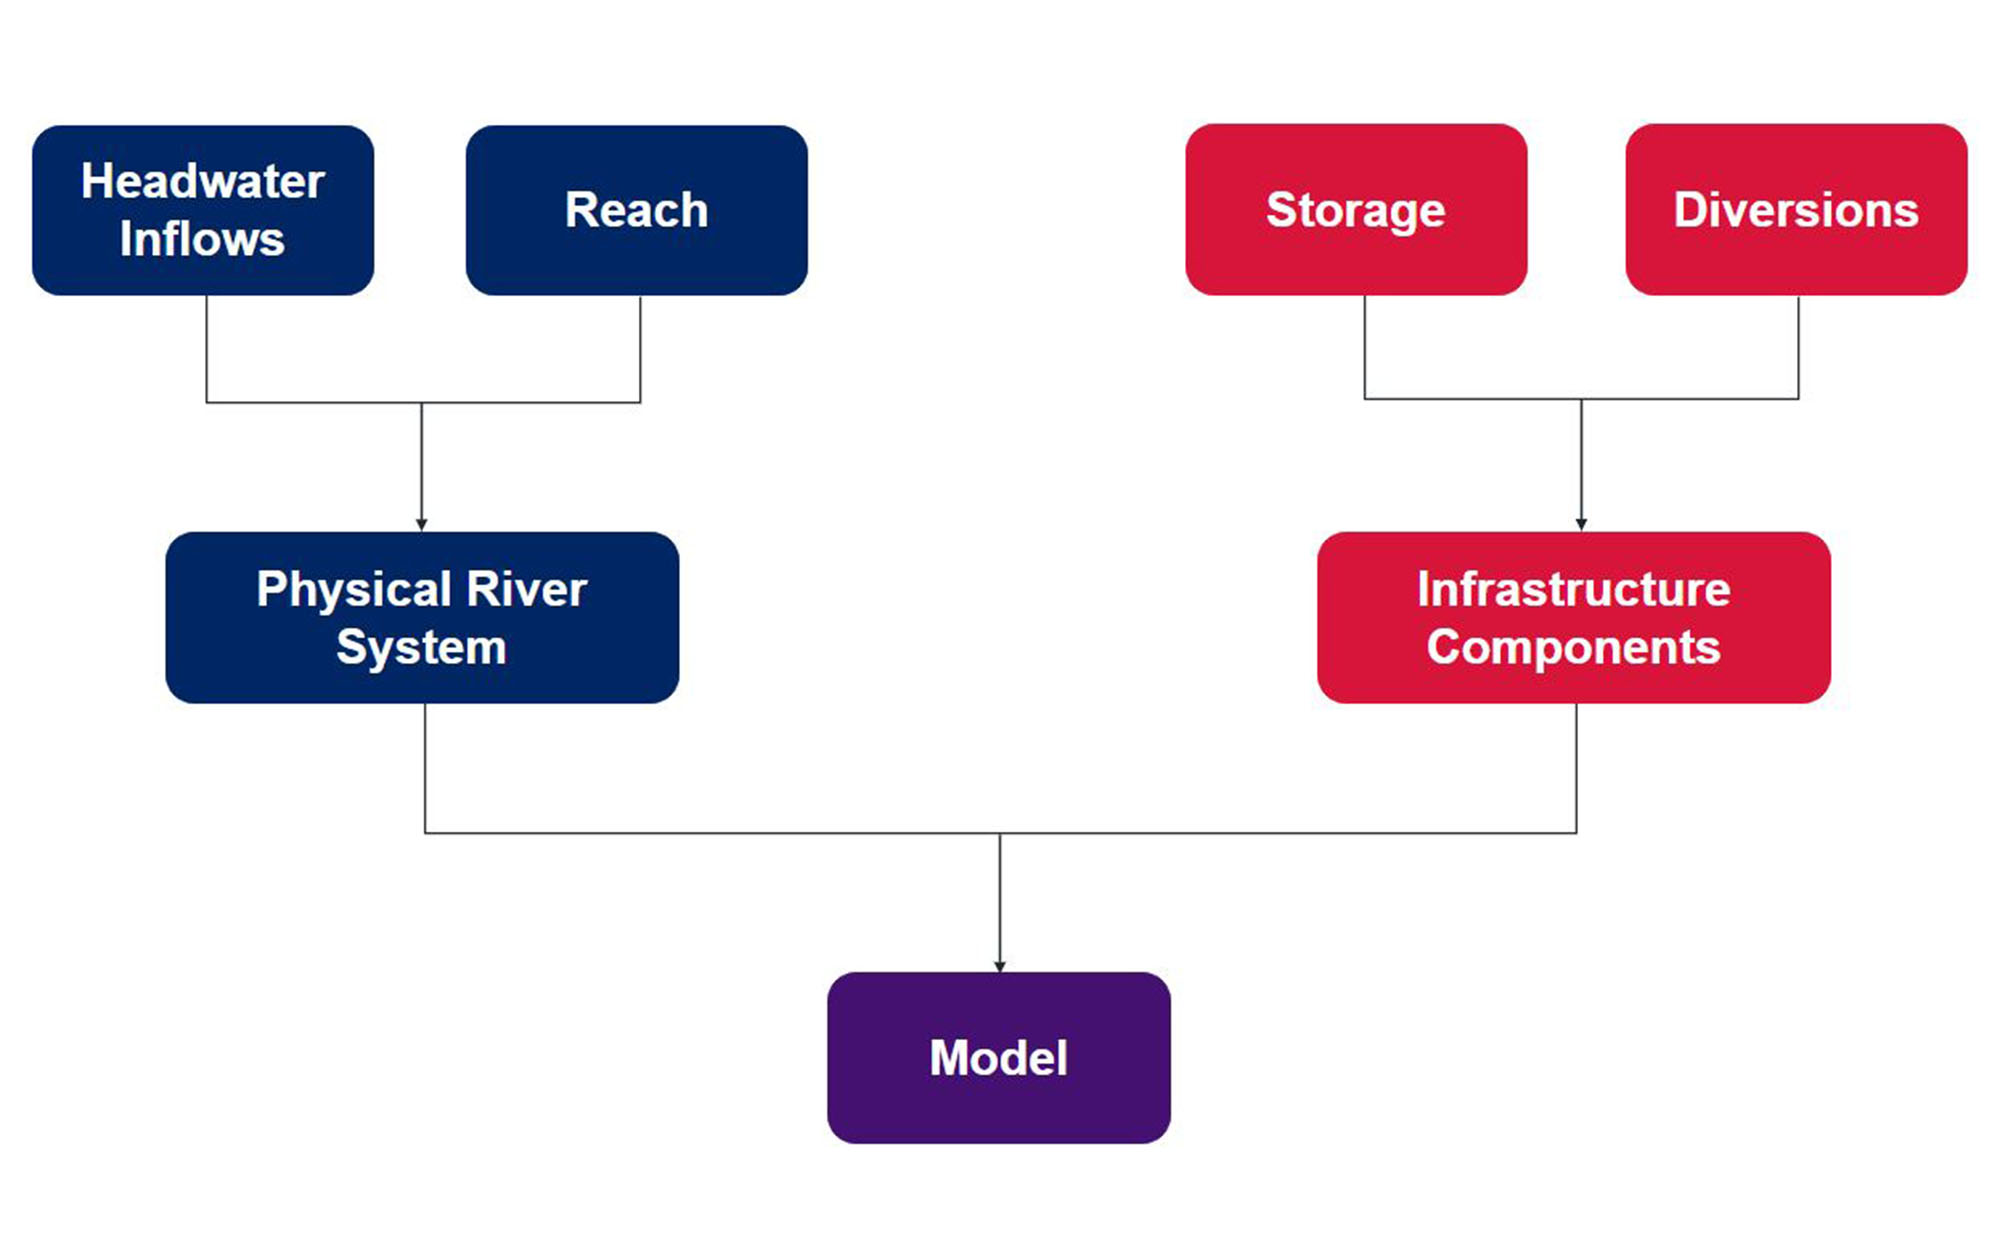
The first step is to represent the river system’s physical characteristics, including headwaters and river reaches. We plan and create nodes for specific characteristics. using relevant data – for example:
- rainfall
- evaporation
- flow
- diversions
- climate
- topography and soils
- cropping practices
-
Step 2
We combine, or ‘stitch’, the headwater and reach components together to form a model of the river system’s physical characteristics and processes.
-
Step 3
Next, we add nodes to represent water storages in the system such as dams and weirs, using data about the storage characteristics and operations. We also add nodes to represent water diversions from the system including for irrigation, farm storage, town water and environmental demands.
-
Step 4
We then stitch these water storage and diversion nodes together to form a model of water storage and use within the river system.
-
Step 5
Lastly, we combine our representations of the river’s physical characteristics, and its storages and diversions, to create a model of the river system as a whole.
Naming conventions
Models might contain tens or hundreds of nodes and links, as well as input data files and functions.
To ensure consistency and make it easier for modellers to find information and use the model, we follow naming conventions for model components.
Reiterating and refining
Building a model is an iterative process.
We might have problems or insights at any stage of building the model. When this happens, we revisit previous steps of the build process.